How to create 2D animations for YouTube without drawing skills

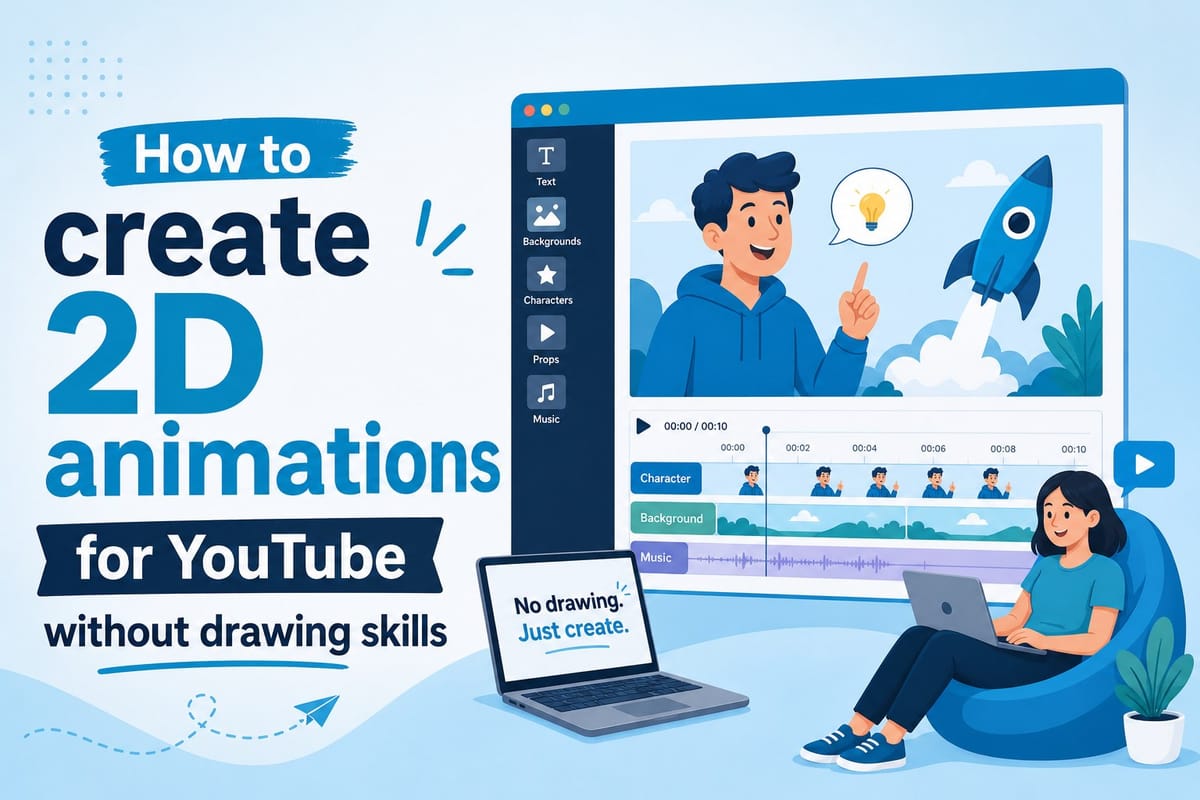
Table of contents
1. Understanding your options before you pick a tool
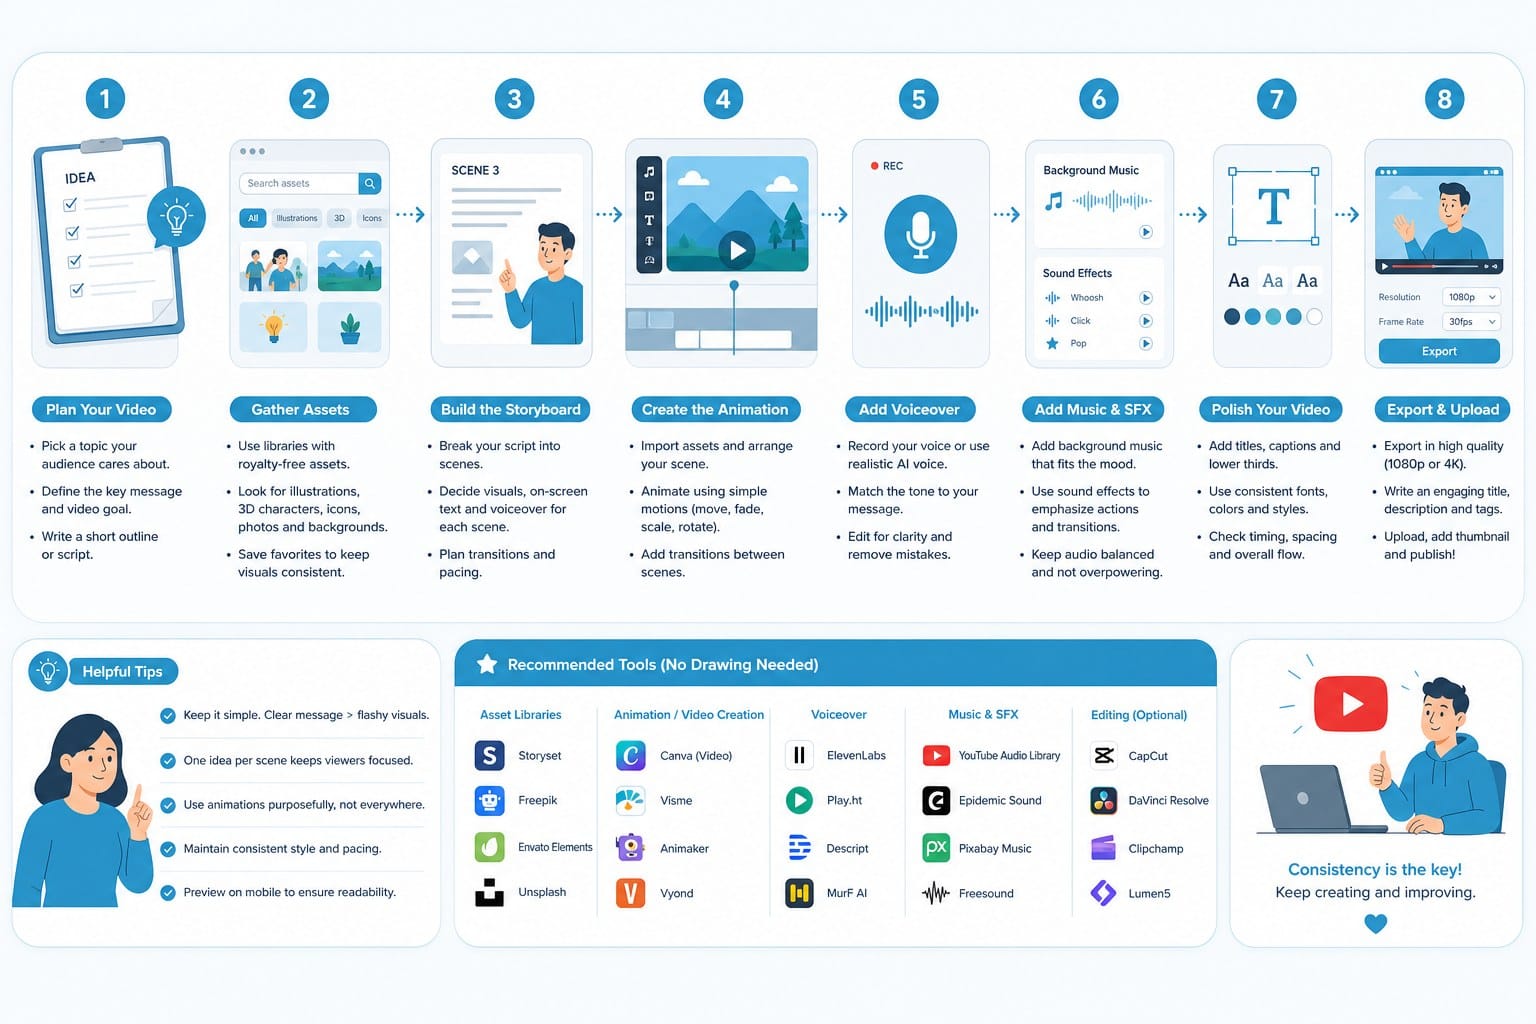
2. The practical workflow for creating animated YouTube videos without drawing
3. Choosing the right animation style for your YouTube niche
Learning how to create 2D animations for YouTube feels impossible when you have never drawn anything more complex than a stick figure. I know that feeling well. Most tutorials assume you already own a drawing tablet, know how to use Adobe Animate, or have months of free time to learn frame-by-frame illustration. The reality for most creators is very different. You have ideas, you have something worth saying, but the technical barrier between your concept and a finished animated video feels enormous. The good news is that the barrier is much lower than it used to be. Modern tools, including AI-powered platforms, have changed what solo creators can realistically produce without hiring an animator or spending years learning design software. In this article, I will walk you through the main approaches available right now, explain what each one actually involves, and help you figure out which path fits your situation best.
Understanding your options before you pick a tool
Before jumping into any specific software, it helps to understand the different categories of 2D animation that work well on YouTube. Each one has a different production process, a different visual style, and a very different skill requirement.
The first category is whiteboard animation. This is the style where a hand appears to draw text and simple images on a white background while a voiceover explains something. You have almost certainly seen this format on educational channels. It is popular because it keeps viewers focused on the information rather than the visuals. Tools in this space typically give you a library of pre-drawn assets, and you just arrange them on a timeline. No drawing required.
The second category is character animation. This is what most people picture when they hear the word animation: characters with mouths, arms, and legs that move around the screen. Full character animation from scratch is extremely technical. However, there is a shortcut called cutout animation or puppet-style animation, where the character is built from separate parts that you move independently. Think of it like moving a paper doll. Software like Adobe Character Animator and similar tools use this approach, and some use your webcam to match your facial movements to the character automatically.
The third category is motion graphics and kinetic text. This is animation where text, icons, shapes, and abstract elements move around the screen to illustrate a point. Think of explainer videos with floating bullet points, animated charts, and zooming headlines. This style is very achievable without drawing skills because you are mostly working with shapes and text rather than hand-drawn characters.
The fourth category, and the one most relevant to YouTube channel growth right now, is AI-generated animation. AI platforms can now produce animated video content directly from a text prompt or script, handling everything from scene composition to motion graphics to narration. This is genuinely new territory, and it removes the drawing requirement almost entirely.
Knowing which category fits your content is the most important first decision you will make. A channel about history documentaries might lean on motion graphics with archival footage. A channel teaching personal finance might work well with whiteboard-style explainers. A channel with a branded character might invest in puppet-style animation. And a creator who wants to publish frequently without spending days on each video might find that AI-generated animation is the most practical path.
I want to be honest about one thing: none of these approaches produces the same result as hiring a skilled 2D animator to draw every frame by hand. What they do produce is content that is good enough to build a real audience, good enough to monetize, and fast enough to post consistently. For most YouTube creators, consistency and clarity matter more than animation perfection.
It is also worth thinking about your channel's visual identity early. Even if you use a template-based tool or an AI platform, you can usually customize colors, fonts, and overall style to create something that feels like yours rather than a generic product. A consistent look builds trust with viewers over time, and it makes your thumbnails and titles feel like part of a cohesive brand rather than random one-off videos.

The practical workflow for creating animated YouTube videos without drawing
Let me walk through what a realistic production workflow looks like when you do not have drawing skills but want to publish 2D animated content regularly.
Step one is scripting. Every animated video starts with a script, and this is the part where your ideas actually live. The script controls everything: the pacing, the tone, the information density, and the emotional arc of the video. If you are using an AI platform, you might start with a prompt and let the system generate a draft script that you then refine. If you prefer full control, you write the script yourself and then feed it into your animation tool. Either way, a tight script saves enormous time downstream because every scene of animation has to be attached to something the voiceover is saying.
A good rule of thumb is to aim for about 150 words per minute for a comfortable speaking pace. A ten-minute YouTube video needs roughly 1,500 words of script. Write your script in short paragraphs or sentence groups that correspond to natural visual breaks. This makes it easier to match visuals to audio later.
Step two is voiceover. For animated YouTube videos, the voiceover carries the content. Viewers are patient with simple visuals if the voice is clear and engaging. You have two main options here: record your own voice or use a text-to-speech AI voice. Recording your own voice is free, creates a personal connection with your audience, and is often more engaging. If you are running a faceless channel and do not want to use your own voice, modern AI voices have improved dramatically. Many platforms include built-in AI narration that sounds natural enough for long-form content.
Step three is scene creation and animation. This is where your chosen tool matters most. If you are using a whiteboard tool, you will drag pre-made assets onto a canvas and set the order in which they appear. If you are using a motion graphics tool, you will work with text layers, shape layers, and preset animations. If you are using an AI platform, you will often just approve or adjust what the system generates from your script.
One thing that trips up new creators is trying to animate too much. Viewers do not need something moving in every corner of the screen at all times. Simple, well-timed animations that appear in sync with what the voiceover is saying are more effective than busy visuals that compete for attention. When I see animated YouTube videos that perform well, they tend to use motion purposefully: a new element appears when it is mentioned, a graphic zooms in to emphasize a key point, and the screen clears before a new idea is introduced.
Step four is adding music and sound effects. Background music sets the mood without distracting from the voiceover. For YouTube specifically, you need music that is either in the public domain, licensed for commercial use, or sourced from a royalty-free library. YouTube has its own Audio Library with free tracks, and there are several well-known royalty-free music platforms. Soft, instrumental tracks tend to work best under educational and explainer content. Sound effects are optional but add polish when used sparingly, like a subtle click when a new graphic appears.
Step five is exporting and formatting for YouTube. Most tools export in MP4 format, which is what YouTube recommends. For standard YouTube videos, 1920x1080 (Full HD) at 24 or 30 frames per second is the right target. For YouTube Shorts, you need a 9:16 vertical format, typically 1080x1920. Some creators produce both versions from the same content by planning their composition to work in both orientations, though this requires some forethought during the scene creation stage.
Step six is the thumbnail. Your thumbnail is not part of the animation itself, but it is part of the viewer's first impression and it matters enormously for click-through rate. Many animation tools let you export a still frame that you can then customize in a free design tool. A strong thumbnail for an animated channel usually shows a clear central visual related to the video topic, bold readable text, and a consistent color scheme that matches your channel's brand.
One workflow tip I find genuinely useful: batch your content. Instead of scripting, animating, and publishing one video at a time, spend one session scripting three or four videos, then one session creating animations for all of them, then one session handling thumbnails and descriptions. Batching reduces the mental overhead of switching between different types of tasks and helps you publish more consistently without burning out.
If you are specifically interested in AI-driven production that handles most of these steps automatically, platforms like Cliptude are worth exploring. Cliptude takes a prompt or a script and handles the research, scripting, visual sourcing, motion graphics, and editing in one workflow, which removes most of the manual step-by-step process I described above. For creators focused on volume or on running a faceless channel, that kind of end-to-end automation changes the math significantly. You can also read about other AI narration tools in this comparison of HeadCast AI alternatives for AI-narrated video creation if you want to explore what different platforms bring to the table.
Choosing the right animation style for your YouTube niche
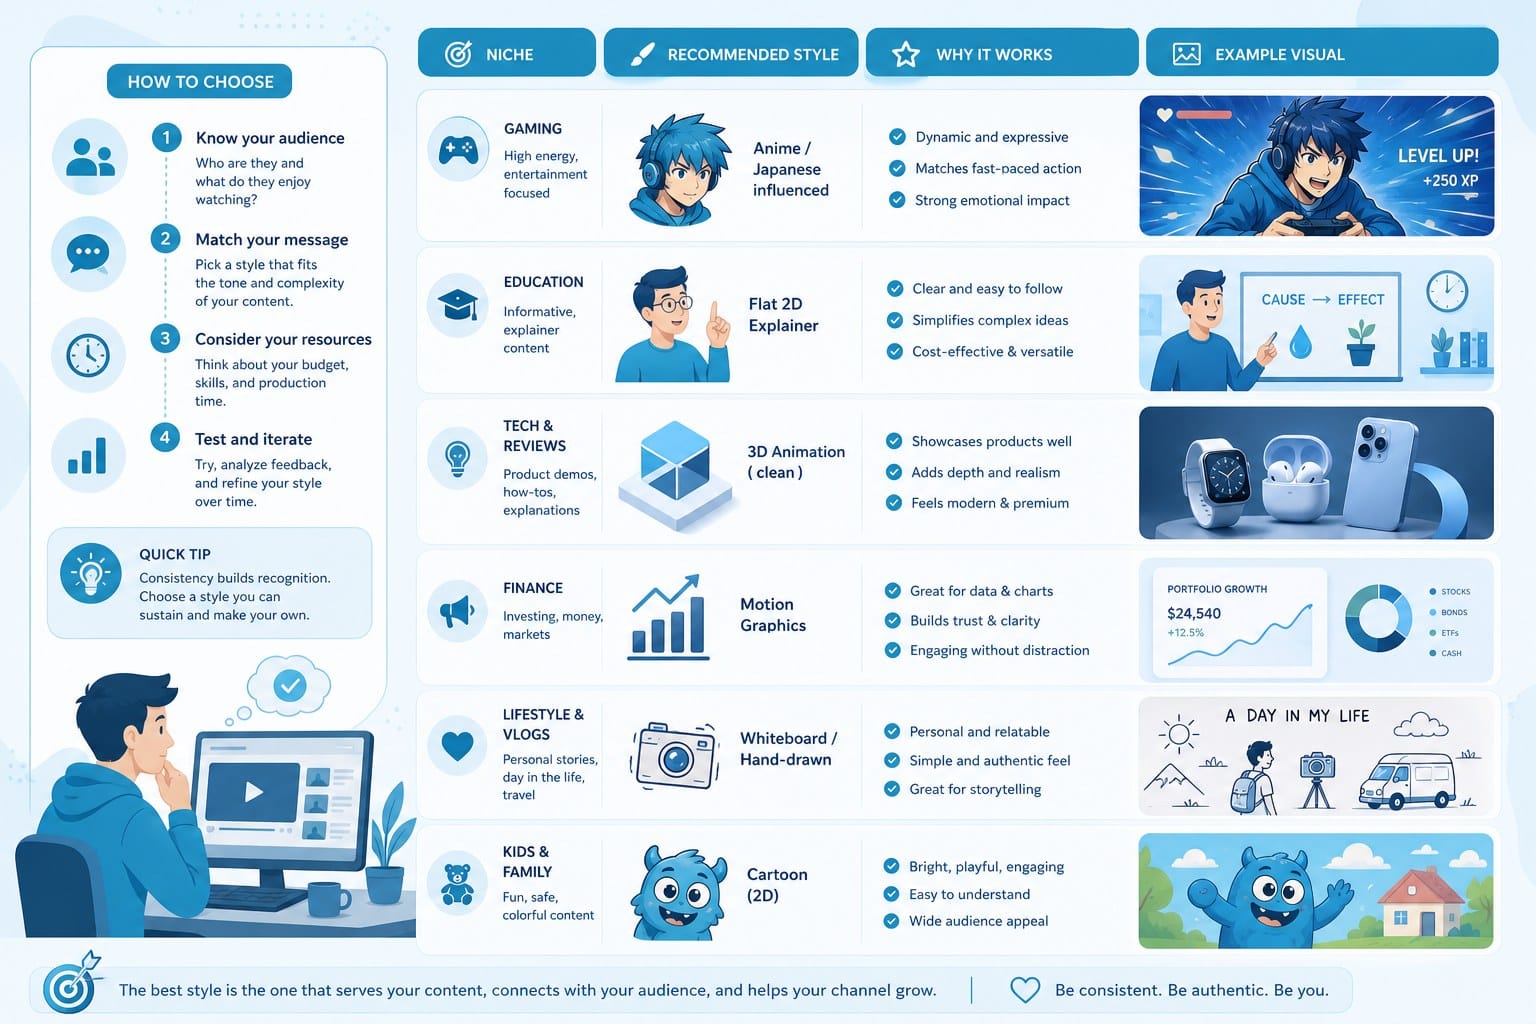
Not every animation style fits every YouTube niche, and picking the wrong one can make your channel feel disconnected from what your audience expects. Let me go through some of the most popular YouTube animation niches and what tends to work in each.
Educational and explainer channels are probably the largest category of animated YouTube content. Topics like science, history, economics, psychology, and personal finance all perform well in animated formats. For these channels, whiteboard animation and motion graphics both work well. The key is that the visuals support the explanation rather than steal attention from it. When someone is explaining how inflation works or why a historical war started, viewers want diagrams, timelines, and simple character illustrations that make the concept concrete. They are not necessarily looking for cinematic character animation.
If you are building an educational channel and want to understand how to create 2D animations for YouTube in this niche, start by looking at what the top channels in your topic area are doing visually. Notice how much is moving at any given moment, how text is used, and how complex the character work is. In most cases, the answer is: simpler than you think, and more consistent than you might expect.
Storytelling and documentary channels are another strong niche for 2D animation. These channels tell true stories, often about real events or real people, using narration and visuals rather than on-camera interviews or found footage. For this style, motion graphics with still images, illustrated maps, and animated data visualizations are common choices. AI platforms that can source and assemble footage alongside generated graphics are particularly useful here because the production scale is high: a ten or fifteen minute documentary-style video has a lot of visual elements to manage.
Listicle channels, which cover topics like top ten lists, ranking videos, and countdown formats, are another major category where animation works well. These videos have a clear structure with repeated visual beats (each item in the list gets a similar treatment), which makes template-based animation very efficient. You set up your template once and repeat it for each item. The consistent visual structure also helps viewers know where they are in the video, which improves watch time.
If you are creating content in a language other than English, animation is an especially powerful format because it removes the visual barrier of on-camera presence and allows you to connect with an audience through voice and motion alone. AI tools are expanding their language support rapidly. If your audience speaks Marathi, for instance, there are now options specifically designed for that context, as covered in this overview of an AI video generator for Marathi content creators. Similarly, Urdu creators can find guidance in this article about AI video generator in Urdu: how to create videos in your language.
Children's educational content is another niche where 2D animation is the dominant format. This category has specific considerations around content guidelines and advertiser policies, but it is also one of the highest-traffic categories on YouTube. If you are creating in this space, character design and visual consistency are more important than in most other niches because young viewers connect with recurring characters. That said, you can still use template-based tools to build a character set that you use across videos rather than drawing every frame yourself.
There is also a growing market for animated commentary and opinion content, where creators use animation to present their perspective on culture, media, gaming, or current events. This style often uses a simplified character to represent the creator, speaking directly to the viewer. Puppet-style animation tools work well here, and AI voice tools can handle the narration if you prefer not to record your own.
Before I close out this section, I want to address a question I hear often: does animation quality affect YouTube monetization? The honest answer is that YouTube's monetization policies focus on content policy compliance, watch time, and subscriber thresholds rather than production quality. A channel with simple but clear animations that covers a topic people genuinely search for will grow faster than a visually stunning channel with no clear topic strategy. Quality matters in terms of audio clarity, information value, and consistency, but you do not need studio-grade animation to build a monetized channel.
What matters most is committing to a niche, building a backlog of content, and improving incrementally. Many successful animated YouTube channels started with very basic visuals and refined their style over dozens of videos. The audience for educational and explainer content is generally patient with visual simplicity if the information is good and the voice is engaging.
One final thought on style selection: try to make a decision and stick with it for at least twenty to thirty videos before changing your visual approach. Consistency in visual style helps your channel feel like a real brand rather than a series of experiments. It also gives you enough data to judge what is actually working, since most channels take three to six months to show meaningful growth patterns regardless of how good the individual videos are.
Ready to take the next step?
If you are ready to start producing animated YouTube content without drawing skills, the fastest path forward is to use a tool that handles the heavy lifting for you. Cliptude is built exactly for this use case. You bring a prompt or a script, and the platform handles research, scripting, visual sourcing, motion graphics generation, and final editing in one streamlined workflow. Whether you are building a faceless documentary channel, an explainer series, or a listicle format, Cliptude gives you a way to publish polished animated videos without needing a design background or a production team. Visit Cliptude to see how it works and start creating.